Showing posts with label Projects. Show all posts

January 13, 2015

Snow Globe Art Project for Kids {@ Or So She Says}

I had this post put together several days ago, and here in Utah it looked more like spring than winter then.  But yesterday, Mother Nature delivered!  It snowed ALL DAY LONG!  Huge, white, wet snowflakes falling like cotton candy from the sky.  It was glorious, at least I thought so!

Snow Globe Art Project for Kids from Blissful Roots

So, the snow globe art project I'm sharing over at Or So She Says today seems a bit more fitting than it did last week.  It's a great activity to do with your kids to bring a bit of the winter wonderland indoors.  And the snow globes always turn out as unique as each creator.  Provide a variety of embellishments to dress up the globes, and let your kids go crazy!   

Stop by and visit me at OSSS (click here for the entire post) for the supply list and how to.  

Thanks so much for stopping by!  I hope you found a little something worth your time.

Linking up to these parties & Savvy Southern Style.

 photo Signature4_zps147dea12.jpg
Pin It

March 28, 2014

Printable Birthday Quotes for Paper Bags

A very special someone, who may or may not be my husband (he hates when I publicly make a fuss about it) has a birthday tomorrow.  So, in honor of his special day, I thought I'd do a bit of a birthday post.

Printable Birthday Quotes for Paper Bags from Blissful Roots

I've share these birthday quotes several times here at Blissful Roots.  They're something I made even before I started blogging, and are still some of my very favorites!

I've also been wanting to try printing on a paper bag for a quite some time now.  So, I thought the birthday quotes and brown paper bags would be there perfect match!

Here's a great tutorial on printing on paper bags.  This tutorial is a bit more complex than my method, but I want to try it some time because it looks more professional than what I did.  In a nutshell, I first printed the quote onto white paper, then taped the brown paper bag to that same white paper (making sure all openings of the bag were taped shut so they wouldn't jam up the printer) directly over the quote.  By doing this, I knew the quote would print on the brown paper bag where I wanted it to because I lined it up with the quote on the white paper.  Then I printed the quote again.  This time instead of printing on the white paper, it printed on the brown paper bag that was taped over the top.  Simple as that!
Printable Birthday Quotes for Paper Bags from Blissful Roots

Printable Birthday Quotes for Paper Bags from Blissful Roots

Printable Birthday Quotes for Paper Bags from Blissful Roots

Printable Birthday Quotes for Paper Bags from Blissful Roots

Printable Birthday Quotes for Paper Bags from Blissful Roots

Printable Birthday Quotes for Paper Bags from Blissful Roots

There are six quotes in all to choose from.  I used a brown paper bag, but they'd look great on white as well.  Click here to print the quotes.  I centered one quote per page, so hopefully that will help you in getting the quotes centered on your bags.  Oh, and I used small brown bags, not standard lunch bag sizes.  The quotes will still work, they'll just be smaller on the bag, or you can try enlarging the quotes when you print. 


Thanks so much for stopping by!  I hope you found a little something worth your time.

Linking up to these parties & Savvy Southern Style.

 photo Signature4_zps147dea12.jpg
Pin It

March 27, 2014

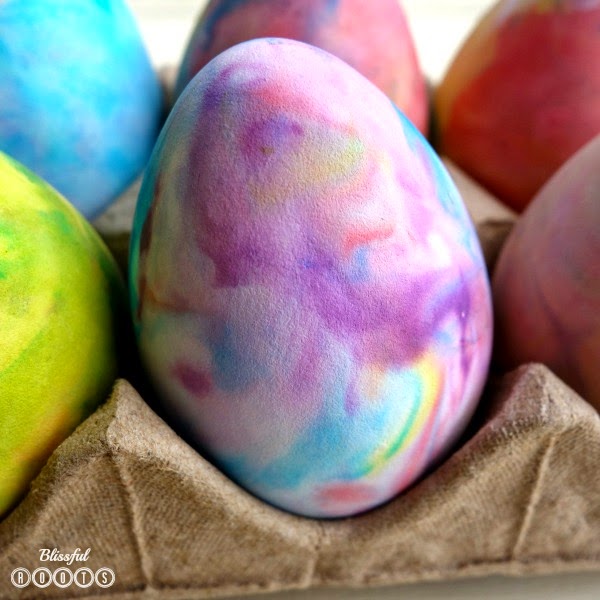
Shaving Cream & Food Coloring Dyed Easter Eggs

I saw a package of all white fake Eater eggs at Walmart several weeks ago, and thought I needed them (white is becoming my favorite color these days), but resisted buying them because I really didn't know what to do with them.   Until... just the other day I somehow got thinking about the eggs again, and how the shaving cream and food coloring art activity we've done before could be the perfect match for the eggs!

Shaving Cream & Food Coloring  Dyed Easter Eggs from Blissful Roots

I picked up a package (they were under $2 for a dozen) of the eggs, and my four-year-old and I decided to give it a try.  I wasn't sure if the food coloring would stick to the eggs (they aren't plastic, they're more papery than plastic) but it totally did.  We even tried it on one of our real chicken eggs, and it worked on that as well!

Shaving Cream & Food Coloring  Dyed Easter Eggs from Blissful Roots

I have all the instructions here for doing the shaving cream and food coloring.  Basically, you'll spread a layer of shaving cream in a small cookie tray, drop drops of food coloring in the shaving cream, swirl the colors slightly with a popsicle stick, and then roll, or kind of stamp each part the egg in the colorful shaving cream.  When we do the shaving cream and food coloring art with paper, we usually scrape the excess shaving cream off with a popsicle stick, but for the eggs, we just wiped it off gently with a paper towel.

Shaving Cream & Food Coloring  Dyed Easter Eggs from Blissful Roots

Like I mentioned, we had a dozen of these eggs, and they went way too quickly.  It's so much fun experimenting with the different colors on each egg.  And our hands were as colorful as the Easter eggs when we were done.  But all part of the fun!

Thanks so much for stopping by!  I hope you found a little something worth your time.

Linking up to these parties & Savvy Southern Style.

 photo Signature4_zps147dea12.jpg
Pin It

February 27, 2014

Bubble Art

My brother-in-law and his girlfriend were here visiting over the weekend.  All three of my boys adore both of them, and it's easy to see why.  They always take the time to play with them, and have such fun ideas!

Bubble Art @ Blissful Roots

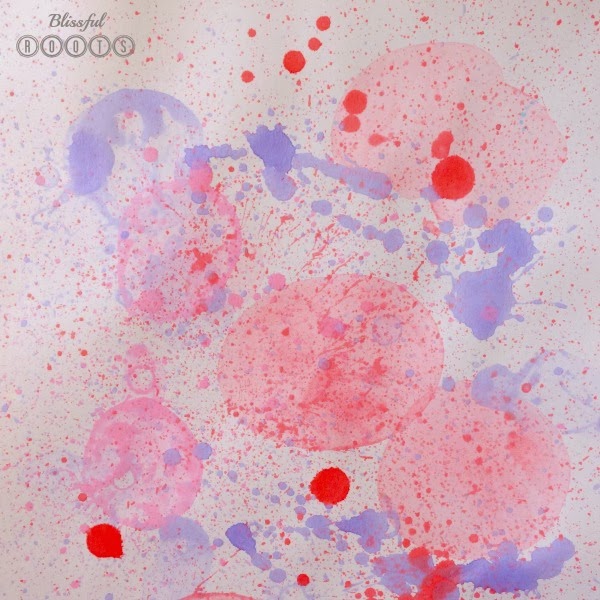
This last time it was bubble art.  Have you heard of it before? I can't believe I hadn't, or thought of it on my own.  It's such a fun, simple way to make amazing pieces of art!  As you look at the overload of pictures, keep in mind these were made by four and seven-year-olds.

Bubble Art @ Blissful Roots

SUPPLIES
Card stock
Bubbles
Bubble wands
Icing Colors (we used Wilton's.  Food coloring would work, but the icing colors are more vibrant)

HOW TO
*Pour bubbles (around 1/2 C.) into as many different cups as you want colors.

*Mix in icing colors.  I'd say we used 1/4-1/2 tsp. of the coloring for each cup of bubbles.  It did take awhile to get the coloring to dissolve into the bubbles.  I'm wondering if you warmed the bubbles slightly in the microwave first, then the mixing might not take quite as long.

*Dip the bubble wand into the colored bubbles, and blow on to card stock.  You can experiment with how close you want to blow to the card stock.  My boys loved to get a bubble to stick to the card stock and then pop it.  That way it made a sun effect.

Bubble Art @ Blissful Roots

Bubble Art @ Blissful Roots

We did this inside, (at the request of my brother-in-law and his girlfriend (they'd done it before)) and I'm glad we did.  I've heard of others doing it outside, and the wind just doesn't help at all.  We put down a big plastic table cloth on the kitchen floor and that worked really well. 

Bubble Art @ Blissful Roots

Bubble Art @ Blissful Roots

Bubble Art @ Blissful Roots

Bubble Art @ Blissful Roots

Be ready to get a bit messy.  My boys had popped colored bubble specks all over their faces.  They looked adorable!  We got it on our hands a bit too, but nothing too bad.  We could have done this all day.  Once you get the hang of it, and start experimenting with different colors, bubble sizes, techniques, you won't want to stop.  Such a fun, creative way to spend some time with your kids!

And here are a few of our other favorite art projects we do at our house.


Shaving Cream & Food Coloring Art
Sticker Stencil Art 


Fingerprint Art

Thanks so much for stopping by!  I hope you found a little something worth your time.

Linking up to these parties & Savvy Southern Style.
 photo Signature4_zps147dea12.jpg
Pin It

February 24, 2014

Think & Wonder… {DIY Dr. Seuss Wall Art @ It's Overflowing}

Happy Monday everyone!  Today, I'm over with Aimee at It's Overflowing.  She's doing a series called 'A Craft Made By You', and she was kind enough to invite me to participate.  I jumped at the opportunity because Aimee is the sweetest gal you'll ever meet, and I love everything she does at It's Overflowing.

Dr. Seuss Quote Wall Decor from Blissful Roots

I have three young boys, and I don't know if this holds true for little girls, but my boys wonder and wonder and wonder.  If I ever sit in their room as their falling asleep, I get a thousand questions about anything and everything.  For some reason right before bed is their "deep thinking" time.  I'm constantly amazed, and somewhat baffled at the questions they come up with.  Often times I don't have an answer for their wonderings.  I always want to foster that love of thinking and wondering in them, so I thought this Dr. Seuss quote would be perfect to hang in their room. 

You can find my entire post here with the easy tutorial on how I made the Dr. Seuss wall art.  I have a link to Country  Living's filament bulb image that I used (don't you love it?), and I let you know where I found my $1.50 stamp sets for the lettering.  Such a fun and inexpensive project!

  And here (in honor of his up-coming (March 2nd) birthday) are a few free Dr. Seuss printable quotes I've made over the past year.  He knows just how to say it!

 Free Printable Dr. Seuss Quote from Blissful Roots
Click to Print

 Free Printable Dr. Seuss Quote from Blissful Roots
Click to Print

 Free Printable Dr. Seuss Quote from Blissful Roots
Click to Print


Thanks so much for stopping by!  I hope you found a little something worth your time.

Linking up to these parties & Savvy  Southern Style.
 photo Signature4_zps147dea12.jpg
Pin It

February 20, 2014

Sticker Stencil Art For Kids

My four-year-old and I do a little "school" every morning.  He has a late birthday, and won't start kindergarten until the fall of 2015.  I know a lot of kids do two years of preschool, but we've always just done one.  I love to teach my boys at home anyway (at least during the preschool years, I'm not sure I have what it takes to always do it).


Sticker Stencil Art For Kids from Blissful Roots

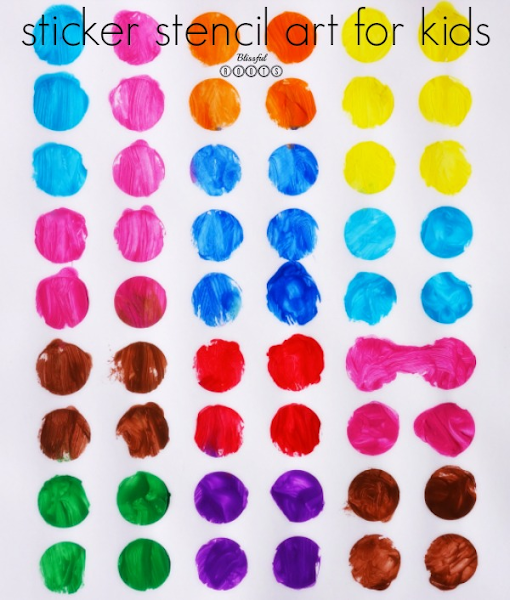
A few weeks ago while doing school we finished a page in his counting sticker book and had this left over.  I immediately thought it was the perfect stencil for a fun art project for my him.  He loves to paint, and so it's fun to find new creative ways to do it.

Sticker Stencil Art For Kids from Blissful Roots

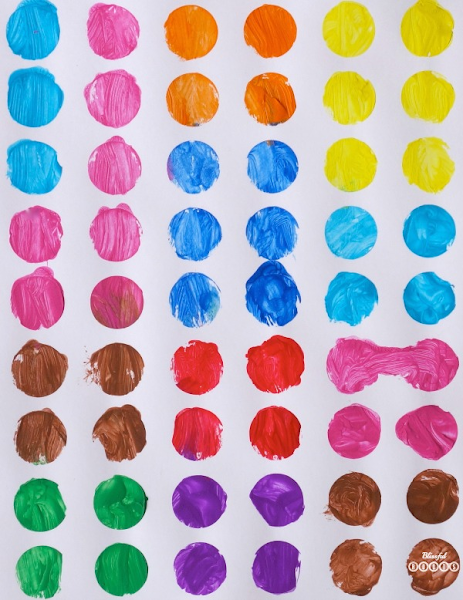
We took the sticker stencil, (the left over part of stickers you usually just throw away) pulled it off of the sticker page, then stuck it to a piece of white card stock.  My four-year-old then went to town painting each circle a different color.  It looked a bit messy, but the magic happened when we pulled the stencil off!  We were left with these perfectly (well, four-year-old perfect) round colorful circles.  We did have a little tear in the stencil, hence the two  conjoined pink circles, but anomalies are cool, right?  An instant, free, amazing piece of art for his bedroom! 

Sticker Stencil Art For Kids from Blissful Roots

Sticker Stencil Art For Kids from Blissful Roots

 We used Crayola's Washable Kids' Paint for his first project, but I'm thinking water colors would be amazing as well.

Sticker Stencil Art For Kids from Blissful Roots

Sticker Stencil Art For Kids from Blissful Roots

I even started experimenting myself.  I used some Mod Podge and gold glitter.  I think I need to fine-tune it a bit, but the potential it definitely there!  Stay tuned.


So, next time you buy or use a set of stickers, don't throw away the outer stencil part.  Save it for an art project for your kids, or a home decor project for yourself.

Thanks so much for stopping by!  I hope you found a little something worth your time.

Linking up to these parties & Savvy Southern Style.
 photo Signature4_zps147dea12.jpg
Pin It